KIKI~
December is here~
Are you guys listening to Christmas songs?
Well, I haven't listen to Christmas songs yet. I usually listen to them about 10days before Christmas. :D
As my post said, I am going to guide you on how to make a simple Sling Bag which is super durable!
Materials needed:
Canvas Fabric: 1-1.5m (Canvas is the perfect fabric for this bag!)
Magnet Clasps (Bag)
Bag Buckles
Bag Slider (LOL. I forgot what this is called!!!)
Steps:
Bag Strap
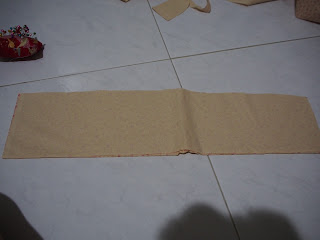
- Cut a long strap of fabric (65inch by 3inch).
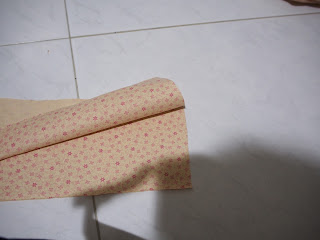
- Fold the long strap into two with the right sides facing each other. (65inch by 1.5 inch)
- Sew along the length.
- Place one of the bag buckles to the end and sew it to secure.
- Insert the bag slider which allows you to adjust the length of the sling later on.
- Then place the other bag bag buckle to the end and sew it!
Main Part of the Bag
- Cut a big piece of fabric (17inch by 24 inch).
- Fold that piece to have a fold (17inch by 12 inch). I wanted the canvas to have a bit of curve, hence I cut the sides to have the curve.
- Sew the two sides. (Ensure that the right sides are facing each other!)
- At the fold, pin a triangle measuring about 2inches from both sides. I wanted to have a gusset at the bottom, you can skip this part if you don't wish to have a gusset.
- Sew them.
Zipper Strap
Bag Cover:
- Cut a big piece of fabric (17inch by 24 inch).
- Fold that piece to have a fold (17inch by 12 inch). I wanted the canvas to have a bit of curve, hence I cut the sides to have the curve.
- Sew the two sides. (Ensure that the right sides are facing each other!)
- Turn the fabric inside out to become the right side.
- Place the Magnet Clasps (Flat part) on the fabric and mark it using chalk or marker.
- Make a slit on the marked part (Only on one of the side!)
- Secure the Magnet Clasps (With the small magnet in the middle) on the slit you have made with the flat part on the wrong side of the fabric. (The right side should have the magnet!).
Loops:
- Cut 2 straps of fabric (3inch by 3inch).
- Fold the fabric (3inch by 1.5inch).
- Sew the sides.
- Turn it inside out.
- Loop it to the buckle!
Connect them:
- Sew left side of the zipper strap to the main bag (only one piece of the main bag).
- Sew right side of the zipper strap in between the bag cover and the main bag (the remaining unsewn part of the main bag).
- With the remaining zipper strap that isn't sew to any fabric, place the loop in between and sew them to close the bag.
- Using the buckle, connect it with the loop.
The last magnet:
Use the one on the right side of the picture!!!
- Place the Magnet Clasps (Flat part) on the main fabric (The one without the cover bag) and mark it using chalk or marker.
- Make a slit on the marked part (Only on one of the side!)
- Secure the Magnet Clasps (With the dented hole) on the slit you have made with the flat part on the wrong side of the fabric. (The right side should have the magnet!).
End product:
I managed to put my camera, water bottle, goodies from AFA, handphone and wallet into the bag!!!
This bag is such a good deal as it only costed me less than $10 to make. Also, it is super easy and fast to make!
I wanted to do a DIY post on the Kiki's dress I sew but I didn't take any pictures D:
Anyways, few people recognised me as Kiki on that day. HAHAHA. I guess my cosplaying was a success~
Recommended Drama:
Mama Fairy and the Woodcutter
This drama is funny and very light-hearted.
I laughed a lot while watching this drama.
The CG might not be the best but it is hilarious enough for you to forgo the CG.
Let's not forget that Moon Chae Won also looks super pretty and delicate.
Since I can't wait to see how this drama will end, I just know I have to recommend this drama!


