Hello!

Airshow was awesome :D
Today I am going to guide you on how to make a Top with a plunging neckline. I have always like plunging neckline maybe because I am a malay. Malay has a festive costume called 'Baju Kurong' which has a 'V' plunging neckline. Therefore, being a malay, I wore lots of Baju Kurong so I came to have a liking in plunging neckline. HEHE. If you think plunging neckline is difficult, you're absolutely wrong! Since I can do it, you can too! So let's get started!
Firstly, you will need to have a bodice pattern. You can use either the front or back bodice pattern.
If you don't know how to make a bodice pattern, just take your favourite top/t-shirt and copy the bodice pattern. You can refer to my previous post on DIY-01 how on to copy a bodice pattern.


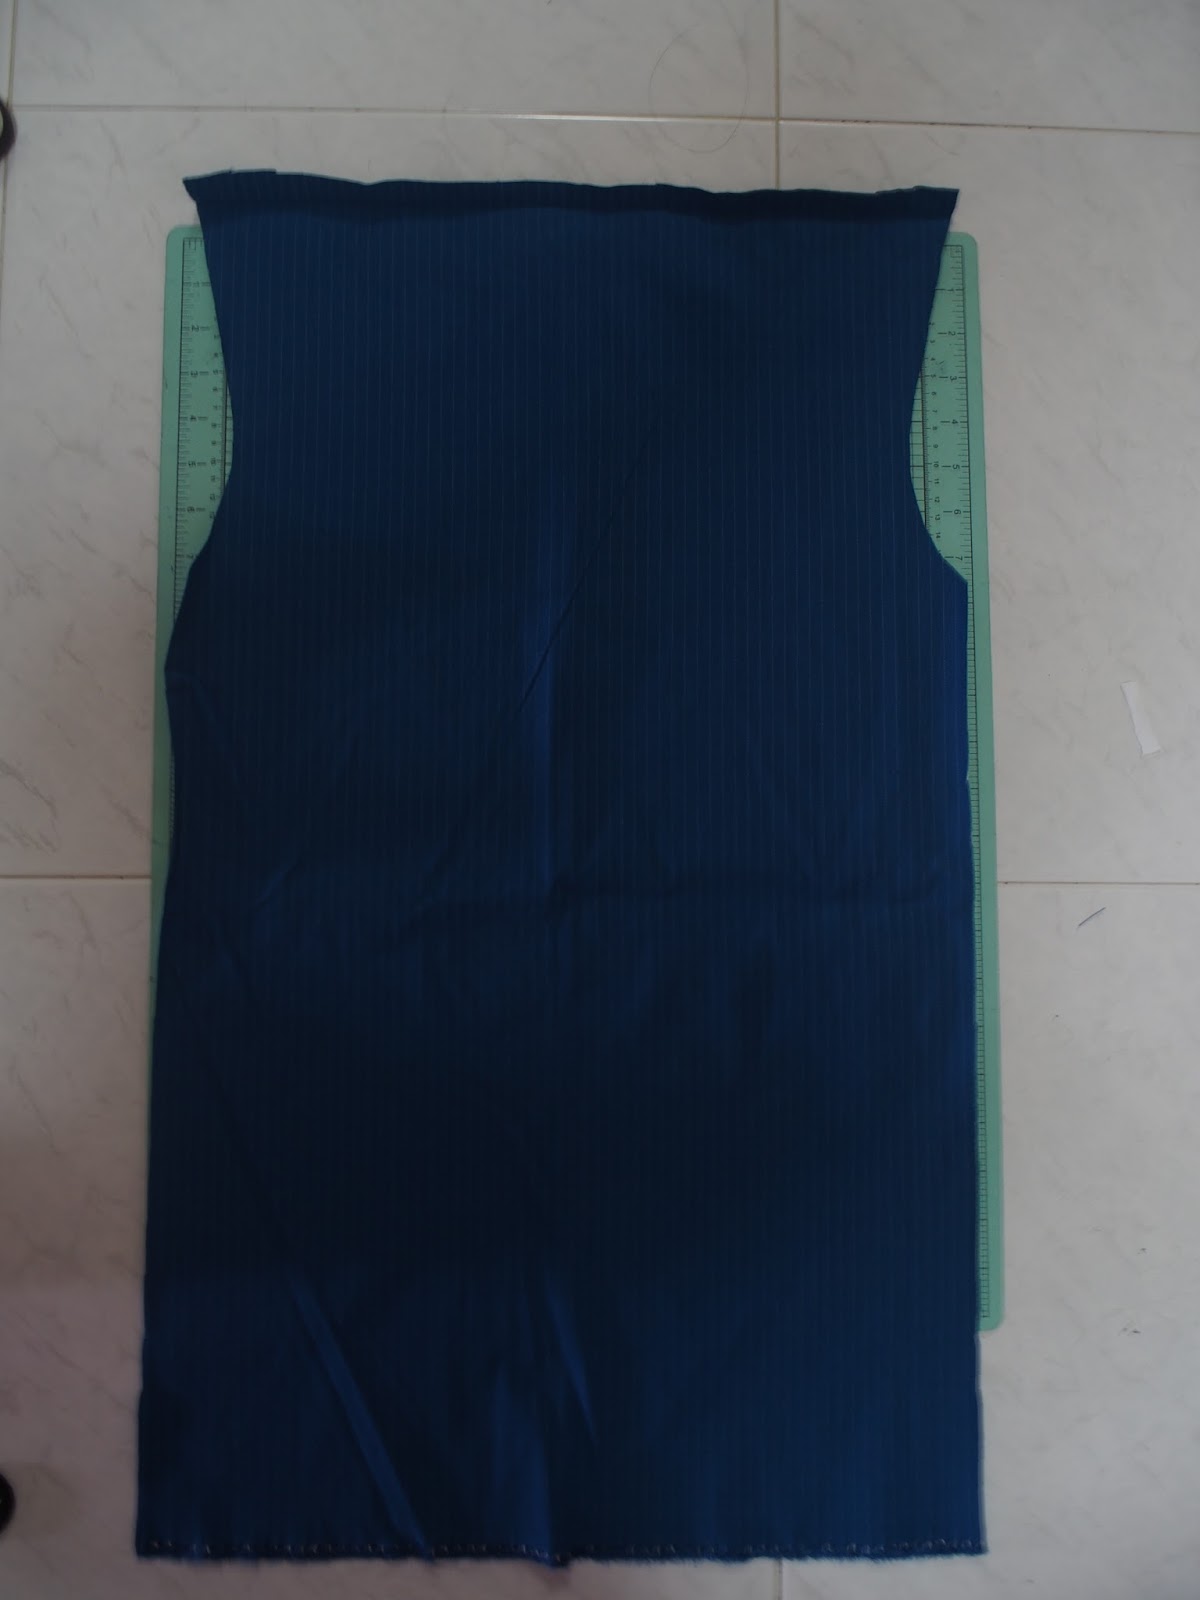
When it comes to cutting the fabric, you have to ignore the neckline area and make a straight cut from the shoulder. In my case, only my front bodice pattern has a neckline. Hence you have to cut the fabric according to the picture below (with the black line).

Don't forget to make two cuts!
Here's how your cut should look like.
Then pin the pieces facing right-right side.

Once you're done pinning, sew the two pieces together. Once two pieces become one, it should look like this:

Now it's time to make the beautiful plunging neckline!
For the neckline, you need to make a semi-circle pattern and I use a protractor to make the pattern. If you're worried that your head might not fit in, you can make the semi-circle larger.

In my case, my diameter was 14cm.

Fold the one piece fabric into half (right-right side) with the sleeve at the top.

Then I place the semi-circle pattern on the one piece, shifting only few cm to the back of the top. Pin the pattern to the piece.

From the end of the semi-circle, make a 10cm mark. Draw a triangle connecting the 10cm mark to the end of the semi-circle. Here's where you can customize the neckline. If you want a larger V, you can make the mark longer. If you want a deeper V, you can draw a larger triangle.

Cut out the fabric following the semi-circle pattern and the triangle you just drew.
After cutting, your piece should look like this:

Now, we can move on to make the lining of the neckline.
Using the same semi-circle pattern, place it on a new piece of fabric (you can also use another fabric pattern for the lining).

Similarly to the neckline, you make a 10cm marking and draw a triangle. Next you add about 1-2" seam allowances around the pattern. Here's a diagram to help you visualize.


Either serge around the lining or do a rolled hem.

You start to attach the lining to the neckline (right-right side) and sew them. Turn it inside out and press the neckline. Sew the edge of the neckline to have a nice finish!
Before we move on to the side seam, hem the bottom of the top. The black line is where the folding of the hems will end.

Since this is going to be an open slit, I mark out 20cm where the side seam will end. Then sew above the 20cm mark.

I decided to add sleeve to the top. Ignore this part if you want a sleeveless top (don't forget to hem the ends if you're not adding sleeves).
I cut out two pieces of fabric and attach the sleeve to the top (right-right side).

Once you've attached the sleeves, hem the ends of the sleeve!

Hang in there! We are almost done!
We will move back to the open slit. Remember the remaining 20cm? Now you make a rolled hem at the respective sides and sew!


Final touches will be adding button and button loop!
So how's the end product?


I am extremely happy with the end result! I thought I would fail terribly in making plunging neckline but it was super easy!
I sincerely hope this post will be helpful for those who are in need of sewing tips! :D
-RECOMMENDATIONS-
Korean drama: 6 Flying Dragons (50Episodes)
I know it's crazy because of the long episodes but I can assure you that this drama won't make you feel bored at all. Every episode is worth watching. It's been so long since I am hooked on a Sageuk themed drama. The team of 6 Flying Dragons has done a fantastic job as I've only found out recently that 42 episodes have already been aired. WHUT?!!! ONLY 8 EPISODES LEFT?!!! NOOOOOOOOOOOO!!!!
Song: Joe Hisaishi - Howl's Moving Castle
Till then~


