Showing posts with label fashion. Show all posts

Sunday, August 6, 2017

D.I.Y (Simple Overall Skirt With Pockets!!!)

Meet my new kitten~
Kuro-SAMA~~~


Materials:

1m of fabric (Red Wine Velvet)


Strap holder (Reused from an old tattered bag)


Sewing machine
Matching thread with fabric
Ruler
A pair of scissors

^I used a footer for sewing velvet because velvet can be hard to work with as it is slightly slippery.


Pattern:

I drew a triangular-ish shape as the skirt and a rectangular shape as the top.


Then from the top, I marked about 4-5" down to make it be the front pattern.


I tried the pattern on and adjusted the armhole area (You can make it wider or narrower or shallower).

Cutting the fabric:

1x Front pattern


1x Back pattern 


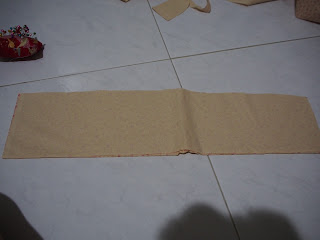
2x 12" by 3" rectangular straps
2x 20" by 3" rectangular straps 
2x Circular shapes (pockets)


Putting it together:

1. Attach the pockets to the side seam-lines


2. Sew the front and back pieces together from the bottom, side seam line and leave about 10" (back) & 15" (front).

3. Hem all the sides (Bottom of the skirt, Rectangular sides).

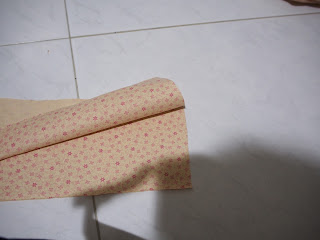
4. Fold the strap into half and sew. Repeat it again at least twice. To make the shoulder strap more sturdy. 


5. Attach the longer shoulder straps to the back piece and sew.


6. Attach the shorter straps to the front piece and sew.

7. Using the shoulder holder and attach both ends of the longer & shorter straps. 


Since I have extra fabric left, I cut a rectangular piece to make a pocket in front.


So how did it go?

End Product:


This is my very first time working with velvet. I am so thankful for the footer because it makes sewing velvet so much easier. (The velvet is thinner because my country is always so warm!!!!)
I absolutely love the colour of this fabric!
There is plenty of velvet left, maybe I will make a skirt or dress.
I am so excited to start on more sewing projects because I've bought new patterns from spotlight for my birthday! HEHE.
Till then, stay tuned~

Recommended Book:
Lord of Shadows by Cassandra Clare


Saturday, May 27, 2017

1st Day of Ramadhan

Hello~


I finally got my stack of fabric to work on new projects!
Last week, I made myself a lace skirt. HEHE.
It turns out super cute.
I can't wait to wear the skirt out.
The japanese sewing book is a good buy. :)


Recommended korean dramas:
Tunnel

Image result for tunnel korean drama
Picture Credit: To rightful owner

Tunnel is a drama about a detective named Park Kwang Ho.
He accidentally time traveled while he was trying to catch a serial killer.

He eventually found out the real reason why he was in a time-slip.
It is either to catch the killer or stay in the future (without identity).

It sounds typical because of the time-travelling concept.
However, after ending the series yesterday night, I think the writer and team has done a fantastic job.
*Applause*
I absolutely love the suspense this drama gives.
It's not perfect, plenty of loopholes, but I can deal with them because the storyline is super good.
I love the ending of this drama- not too dramatic or unrealistic.
Great Job to the team of Tunnel!
I am so thankful to OCN because it has been providing good Thriller dramas and I hope they continue to do so.


Sunday, February 12, 2017

DIY: Blouse with ruffles~

 I am finally doing a DIY post!!!
YIPPIE~


Nope, above pic isn't what I am going to post on. LOL.
I forgot to snap some pictures while making that shirt.
HAHA. My bad.

Materials Needed:
  1. 1-1.5m of fabric
  2. Sewing machine
  3. Thread
  4. A pair of scissors
  5. Papers for pattern making
  6. Zipper
  7. Pins


Cutting the fabric:
  1. 1x Front Bodice
  2. 2x Back Bodice
  3. 2x Sleeves
  4. 2x 20"by 4" rectangular pieces
  5. 2x 10" by 4" rectangular pieces


I basically traced out the pattern from a shirt. You can adjust the length of the blouse and the shoulder of the blouse according to your preferences. I like my blouse to have a longer sleeves. Hence I lengthen the sleeve.


Assembling the pieces:


  1. Sew the shoulders together.
  2. Attach the sleeves to the armhole.
  3. Sew the side seams.
  4. Attach zipper to the center back.
  5. Sew the center back.
  6. Create a neckline facing using the remaining fabric.
  7. Sew the facing to the neck line.
  8. Gathered the rectangular pieces to create ruffles.
  9. Attach ruffles to the raw edges of the blouse and sleeves. 
  10. Hem the ruffles.


 Pull the bobbin thread when it comes to gathering~


End product:


This basically took me less than 4 hours to finish. It is really simple. I could have completed it much earlier but sometimes, my sewing machine doesn't want to cooperate with me. :(


I am only left with one set of fabric. It is finally the time for me to purchase some fabrics for more DIYs. Meanwhile, I just finished an upcycle project. I think I am going to do some upcyling over the following weekends while I find some fabric online and wait for the fabric to arrive. Till then~


Friday, September 30, 2016

Skater Dress


Let's do this!


Hey! It is almost 12am here and I am still awake. Let me finish this post and I'll get to bed soon enough. I wanted to upload two other projects which I had finished long long time ago. However, as usual I forgot to document them. Anyways, one of them I made using a pattern from a Japanese book and another was a pyjamas for my mom. I think I can skip on teaching you how to make them. LOL.
Today, I will be teaching you how to make your own skater dress. HEHE.

Materials:
Fabric (slightly stretchy) 1.5m-2m
Sewing machine
Lace
Thread

Skater skirt pattern:


When it comes to sewing a skirt, your waist measurement is the most important thing. Hence, always have your waist measurement recorded before starting on a skirt project! Afterwards, you can use this app/website to create your own pattern!

App/Website: http://byhandlondon.com/pages/circle-skirt-app

Since it is a circle skirt, you have to click on the FULL.
Let me show you an example:


Then it will show you have your skirt pattern should be like


Top pattern:


Take your favourite Dress or Top
Fold it into half.

Trace out the bodice. (I did not trace out the whole length of the top but only to wear I want the bodice to end)

I am very lazy to make a pattern for both the front and back bodice hence I decided to roughly draw a curve at the neck line to differentiate the front and back of the bodice. (The first curve is an alteration to the back bodice)

Then I snip off the first curve which will be my back bodice neckline.

In case you have no idea what I was talking about. I labelled for you! (For this piece, the neckline for the front isn't so low, the curve is much nearer to the back)
Draft out the sleeve (In this case, I want a short sleeve).

Cutting the fabric:
Front x 1
Back x 1
Sleeve x 2
Skirt x 1
Rectangle piece (20" by 4") x 2

Assembling the pieces:

1. Sew the shoulder area together.
2. Attach the sleeves to the armhole and sew.
3. Sew the opening ends to close the sleeve.
4. Sew down to the side seam line however leave about 2" open.
5. Sew the rectangle piece to make a tube (~20" by 2").
6. Overturn the tube with the right side facing you.
7. Attach each tube to the openings of the side seam and sew.
8. Sew the skirt to the top.
9. Hem the neckline and sleeve.
10. Pin the lace to the hem of the skirt and sew it as a decoration.

So how did my dress went?


There wasn't enough lace for the hem. So I went online to order some and of course, I won't be using the same lace shown on the picture since I managed to find even prettier lace. HAHA. I will show the new result of the dress with the new lace I bought on my next post (hopefully)!!! I guess the lace above can be used for another project! YAY!

Lots and lots of love from me~~~~

Please visit my youtube channel, mahirah html :)

Hi, I have no idea who is reading this. If you love to sew, DIY and see random unboxing, it will be great if you can subscribe to my chan...

Labels