Friday, September 30, 2016

Skater Dress


Let's do this!


Hey! It is almost 12am here and I am still awake. Let me finish this post and I'll get to bed soon enough. I wanted to upload two other projects which I had finished long long time ago. However, as usual I forgot to document them. Anyways, one of them I made using a pattern from a Japanese book and another was a pyjamas for my mom. I think I can skip on teaching you how to make them. LOL.
Today, I will be teaching you how to make your own skater dress. HEHE.

Materials:
Fabric (slightly stretchy) 1.5m-2m
Sewing machine
Lace
Thread

Skater skirt pattern:


When it comes to sewing a skirt, your waist measurement is the most important thing. Hence, always have your waist measurement recorded before starting on a skirt project! Afterwards, you can use this app/website to create your own pattern!

App/Website: http://byhandlondon.com/pages/circle-skirt-app

Since it is a circle skirt, you have to click on the FULL.
Let me show you an example:


Then it will show you have your skirt pattern should be like


Top pattern:


Take your favourite Dress or Top
Fold it into half.

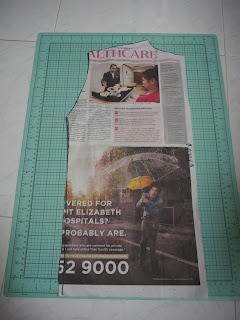
Trace out the bodice. (I did not trace out the whole length of the top but only to wear I want the bodice to end)

I am very lazy to make a pattern for both the front and back bodice hence I decided to roughly draw a curve at the neck line to differentiate the front and back of the bodice. (The first curve is an alteration to the back bodice)

Then I snip off the first curve which will be my back bodice neckline.

In case you have no idea what I was talking about. I labelled for you! (For this piece, the neckline for the front isn't so low, the curve is much nearer to the back)
Draft out the sleeve (In this case, I want a short sleeve).

Cutting the fabric:
Front x 1
Back x 1
Sleeve x 2
Skirt x 1
Rectangle piece (20" by 4") x 2

Assembling the pieces:

1. Sew the shoulder area together.
2. Attach the sleeves to the armhole and sew.
3. Sew the opening ends to close the sleeve.
4. Sew down to the side seam line however leave about 2" open.
5. Sew the rectangle piece to make a tube (~20" by 2").
6. Overturn the tube with the right side facing you.
7. Attach each tube to the openings of the side seam and sew.
8. Sew the skirt to the top.
9. Hem the neckline and sleeve.
10. Pin the lace to the hem of the skirt and sew it as a decoration.

So how did my dress went?


There wasn't enough lace for the hem. So I went online to order some and of course, I won't be using the same lace shown on the picture since I managed to find even prettier lace. HAHA. I will show the new result of the dress with the new lace I bought on my next post (hopefully)!!! I guess the lace above can be used for another project! YAY!

Lots and lots of love from me~~~~

Thursday, September 29, 2016

Simple Top with ruffle lace~

Argh, I am so behind with my updates!!! :(


Here's a quick update. I will try my very best trying to explain because I totally forgot to take pictures while making the top. I suck so badly. :( Sorry. I hope you can grasp what I am going to type.

Materials:
1. Fabric 1-1.5m
2. Thread
3. Sewing machine
4. Lace (Ruffle type)

Creating the pattern:
As usual, I take any shirt which I am most comfortable in and use it to trace out my pattern. Copy the front, back  and sleeve pattern. If you have no idea what I am talking about, you can refer to my old post.


Cutting the fabric:

Using the patterns, cut out the fabric. Front x 1, Back x 1 and sleeve x 2.
For this top, I shortened the sleeves length by 3".
Next, cut two rectangle pieces of fabric measuring 4" by 16".
Make a bias tape for the neckline by cutting out a piece of fabric with the measurement of 2" by 22" (It is better for the bias tape to be longer than the actual neckline measurement).

Assembling the pieces:

1. Sew the shoulders with the right pieces facing each other.
2. Attach the sleeves to the armholes.
3. Sew the open ends of the sleeves and the side seam lines.
4. Pin the rectangle piece - 4" by 16" to the end of the sleeve (Create few pleats to match the piece to the sleeve). Sew the pieces together.
5. Hem the ends.


5. Using the bias tape, sew it to the neckline. Cut off any excess fabric.
6. Sew ribbon fabric around neckline with an excess of around 6" long at both of the ends.


6. Lastly, sew lace to the hem.


What's the end result?


Isn't it cute? HEHEHE!!!

This is absolutely easy to make! I have worn this top twice because I am so proud of my own creation. HAHA. I hope you can find the courage to make your own top too. Don't hesitate and start now!!! I am always here cheering for those who just begin their sewing journey!

XOXO,
Mahirah

Recommended song: Step Step by Suran

Sunday, September 4, 2016

Onesie (TOTORO Version)

I skipped a whole month and here I am. HAHAHA.

OMG.
 Looking at this picture shows how much time has passed. We're in our 20s now. 
Let's celebrate our 30s, 40s and 50s together~~ HEHE.


ONESIE~

Today I am going to teach you how to make your very own onesie~
Since I am totally in love with Totoro (Of course Domo is still my number 1), I made a Totoro Onesie for myself. It's actually super easy to make but it requires plenty of time and patience. So remember to take your time so that the end product looks amazing (like what you could buy from store).

Let's get started~

Before you begin, you need to know what type of onesie you're making. For example, if you're planning to make a Stitch onesie, you need to get the necessary colours (Blue, Black, etc.). Since I am making a Totoro version, all I need are these various colours- Black, Grey and White.

Materials:
  1. Black- <0.5m of fleece
  2. White- <0.5m of fleece
  3. Grey- >1.5m of fleece
  4. Buttons/ Zip
  5. Stuffing- <250g
  6. Elastic band

Creating the body:
  1. Lie down and trace your body pattern or you can ask someone to help you trace out.
  2. The front bodice will be divided into two parts while the back bodice will be one piece.
 Assembling the body:


  1. Sew both the shoulders with the right sides facing each other.
  2. Sew both of the side seams.

Creating the belly:
  1. Draw a huge semi-circle which fills up the front bodice and few inches below. 
  2. Cut out two pieces of this pattern using the white fleece.
  3. Cut out eight pieces of crescent shapes using the grey fleece.


Assembling the belly:
  1. Sew 4 crescent shapes on each semi-circle.
  2. Sew the semi-circle on each front bodice (It is alright if the semi-circle touches the pants area).
  3. Sew the crotch area and the inner side seam which will create pants.


Attaching the sleeves:
  1. Copy the armhole area and create your sleeve pattern (You can choose to make it short or long sleeve).
  2. Cut out two pieces using the grey fleece.
  3. Sew the open ends.
  4. Pin the sleeves to the armholes and sew.


Attaching the Buttons/Zipper(I am using buttons instead of zipper):

  1. Mark out where you want the buttons to be placed.
  2. Create buttonholes for the respective buttons.
  3. Sew the buttons on the front bodice.


Attaching the hoodie:

  1. Measure the neckline.
  2. Cut out two pieces of a hoodie-like pattern whereby both pieces will add up to the measurement of the neckline.
  3. Sew the hoodie to the neckline.


Creating Totoro:
  1. Cut two pieces of a long rectangle with a rounded tip (Grey) - A.
  2. Cut four pieces of a short rectangle with a rounded tip (Grey)- B.
  3. Cut a semi-circles (White).
  4. Cut two big circles (White).
  5. Cut two small circles (Black).
  6. Cut out a small triangle (Black). 
 
Assembling Totoro Tail:
  1. Sew A with right sides facing each other.
  2. Put in stuffing into A.
  3. Place A at the back near the butt area and sew. 
Assembling Totoro Face:
  1. Sew B with right sides facing each other.
  2. Put in stuffing into B
  3. Place B at the hoodie about 2-3 inches away from the side and sew.
  4. Using an embroidery thread, sew lines down the white semi-circle to create teeth.
  5. Attach the semi-circle using a fabric glue or hot glue on the bottom of the hoodie.
  6. Glue the small circle on top of the big circle which will create eye.
  7. Attach the eyes on hoodie using glue.
  8. Glue the small triangle to make it look like a nose.


Final touches:
  1. Hem the ends of the shoulder by adding bias tape.
  2. Hem the ends of the pants by folding in 1" and sew around but leave about 1-2" gap.
  3. Insert elastic band into the gap and close the opening by sewing.


Outcome:


YAY!!!
It looks amazing! I am so glad it turned out well.

If you're wondering how long it took me to finish this, I took about two weekends (less than 5 hours each) because I forgot to purchase black fleece and my machine wasn't coping so well with fleece fabric. Luckily, I switched the foot to ultra glide foot and it worked like magic. I also made some errors when cutting out the hoodie, eyes and nose. It took me awhile to get the right measurement to make the onesie looks like a totoro instead of some weird monster. HAHA. I used zigzag stitches, hand stitch and straight stitches when it comes to attaching the various parts. You will probably know which stitch works better when you're making it.

I hope that you find my website helpful and inspires you to make your own onesie. I have completed three sewing projects and have yet to update it on my blog so I am trying my very best to update them. Hence if you are interested to know what projects I am currently making or made, you can follow my Instagram account. Since I always upload my finished work there instead of here. My blog is kind of lagging. HAHA.

Thank you very much for reading! Lots and lots of love~


Please visit my youtube channel, mahirah html :)

Hi, I have no idea who is reading this. If you love to sew, DIY and see random unboxing, it will be great if you can subscribe to my chan...

Labels