Tuesday, May 17, 2016

DIY: Cardigan

Hey my wonderful readers!
It's time to learn how to sew yourself a cardigan.

Materials:
  • Knit Fabric
  • Sewing machine
  • Thread
  • A pair of scissors
  • Buttons (Optional)
  • Paper (For making pattern)
 1. Making the pattern

Using your favourite cardigan or sweater, trace out the front, back and sleeve pattern on pieces of paper.

If your cardigan has a hoodie, you might want to trace it out.
 
2. Cutting the fabric

Once your patterns are ready, use the scissors to cut out the pattern with an additional 0.5-1" allowances around the edges.


3. Assembling the pieces

*ensure that the right-right sides are facing each other before sewing
*working with knit fabric without a serger or overlock machine may requires you to use zigzag stitching

Firstly, pin and sew the shoulder pieces together.


Secondly, pin and sew the sleeves to the respective armhole.


Thirdly, pin the raw edges of the sleeves and the side seam. Once you're done pinning, you can sew the sleeve and the side.


+This applies to those who have/like to have a hoodie+ 
Lastly, pin and sew the hoodie to the collar area and close the hoodie by sewing the top part.


4. Finishing touches

Cut out a long strip of fabric with a width of 2" with the length of raw edges. This strip acts as a bias tape hence sew it around the raw edges of the cardigan.

You may add buttons and button holes to the bias tape. Also, you may like to have small pockets at the front of the cardigan which will make it extra cute.

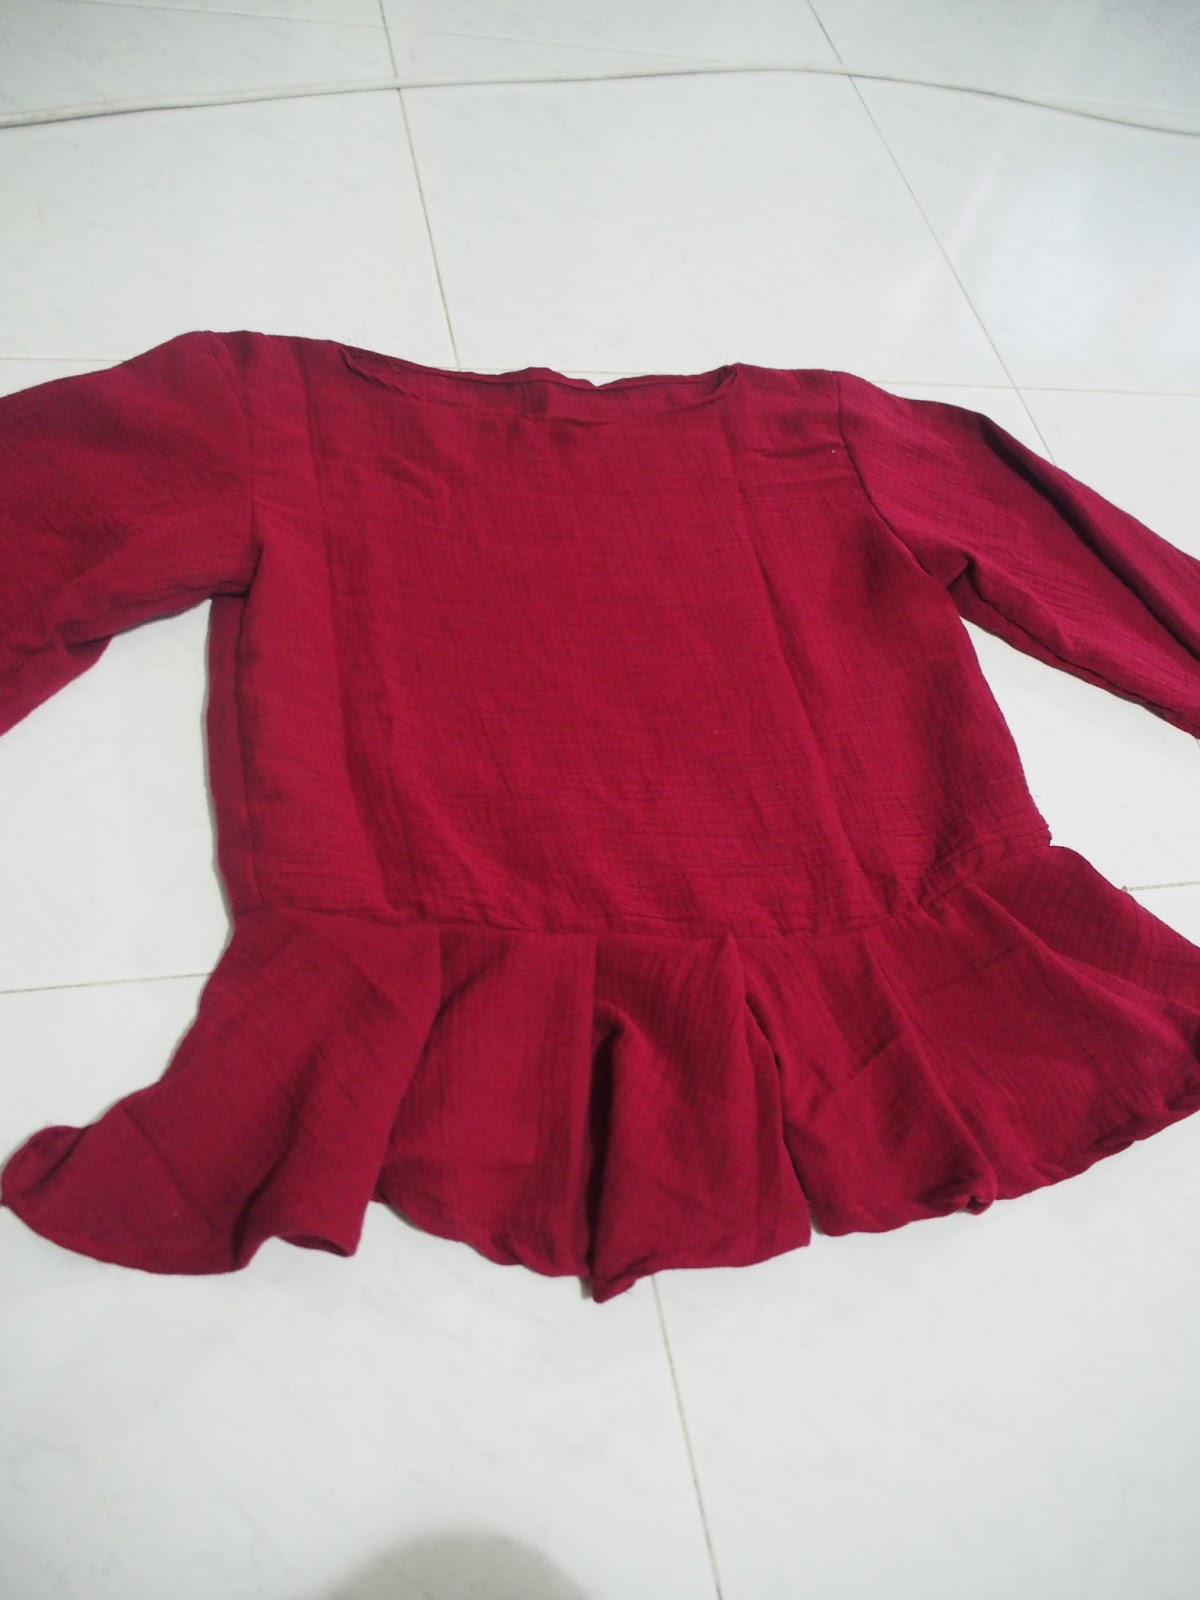
So how did my cardigan turn out?


I will be redoing the bias tape because the length was too short which caused my cardigan to curl.
Hence it is important that your bias tape is long enough to prevent curling. Other than that, I am satisfied with the end result. Once my bias tape is redone, I will be adding buttons to it! HEHE.
Also, I will upload a new photo soon with a better output!


This smock dress is by far the best thing I've ever sew! *Dances*

Recommended drama: Flower in the prison


Friday, May 6, 2016

Part 2: Peplum top with bell sleeves

I just checked that it's been over a month since I last updated!
At least I am back! Oh and I can't wait to sew from one of the books! HEHE.

This is my first time making a pattern without using any measurements from a shirt or myself.
I was basically using my own imagination while doing the pattern. HAHA.

Step 1: Making the pattern

I just found out how useful french curve is when it comes to making pattern! Thanks to french curve my pattern turns out well!

 The base of the top was around 9". Using the base as a guideline, I make the armhole using the french curve.

 As for the neckline, I drew two different curves to differentiate the front and back of the top.

Tada~ The bodice pattern is done!

As for the sleeve, instead of the normal straight end, made a curve.

As for the width of the sleeve, I made it wider as the sleeve goes down.

Step 2: Attaching the pieces together

Before you start sewing, pin the various patterns to the fabric and cut accordingly.
With the fabric cut out, you can start sewing.

As usual, sew the shoulder area first. Afterwards, attach the sleeves to the armhole and sew the sleeves. Lastly, sew the side seams.

Step 3: Cutting out the skater skirt

Measure the waist of the top. Using the skater skirt measurement app, cut out the skater skirt. Since I am making a peplum top, the length of the skirt doesn't have to be very long. In my case, the length was around 4-5".  You can refer to my previous post (Circle Skirt) how to cut out a circle/skater skirt.

This is a terrible photo. I took a photo without finish cutting out the skirt. Can you spot the mistake? HAHA.

*If you want the peplum top to be slightly different than usual, add a few more inches to the waist measurement. This allows some room for few pleats which I managed to do so!

Step 4: Assembling and final touches

Attach the skirt to the top. Since I added a few inches, I did few pleats to the front of the top while leaving the back of the top as usual.

Lastly, hem the raw edges of the sleeves, neckline and skirt.

So after eyeballing everything, how did the top turn out?

I think it turned out alright. It would be even better if I had used a top for reference. Well, ironing will also help. HAHAHAHAHA! I can't wait to wear this top tomorrow! I shall upload some pictures of myself wearing this top! Since I can't sew, maybe I shall post pictures of myself wearing my own creations.

Oh Why. Oh Why did I stop blogging when it's so much fun!!! I hope to be able to sew a simple project this coming Sunday before leaving for dinner to celebrate Mother's Day!

Let me take this opportunity to wish A Happy Mother's Day to all the wonderful and lovely mothers all around the whole! :D
Recommended anime: Another

Part 1: Smock Dress

I've finally finished playing Dead Space 3!!!
Woo-hoo~~~

I am finally blogging! I know it's been a while. I wasn't in the mood to update and every time I wanted to, I ended up doing something else. Why do I suddenly decide to blog? I realised that I won't be able to update my blog since I am unable to sew this week! :(

As the title goes, I am going to teach you how to make your very own smock dress!!! :D

Materials:
2-2.5m of fabric
Thread
Sewing machine
Needles


Step 1: Making the pattern


Take your favourite Dress or Top
Fold it into half.

Trace out the bodice. (I did not trace out the whole length of the top but only to where I want the bodice to end)

I am very lazy to make a pattern for both the front and back bodice hence I decided to roughly draw a curve at the neck line to differentiate the front and back of the bodice. (The first curve is an alteration to the back bodice)

Then I snip off the first curve which will be my back bodice neckline.

In case you have no idea what I was talking about. I labelled for you! HEHE!
Draft out the sleeve.
Step 2: Cutting the fabric (Bodice & Sleeve)

 Pin the pattern to the fabric and cut out the back bodice.

Follow the previous step. To get the front bodice, cut out the back neckline.

Now, you will have both the front and back bodice! YAY!

Follow the sleeve pattern and cut the fabric out.

Step 3: Sewing the patterns
 Pin the shoulder with right sides facing each other. Then sew the raw egdes.

 Pin the side seams and sew them down.
Attach the sleeves to the bodice right sides facing each other.

Step 4: Cutting the pattern (Skirt)

Measure the waist of the bodice and add about 10-15" to the waistline measurement. Since my fabric wasn't long enough to cut out the exact waistline, I cut out about four pieces of fabric which added to the waistline. The length of the skirt will be your own preference. I want to make a mini smock dress hence my length of the skirt is shorter than usual dress. 

Since I have extra fabric and I wanted my smock dress to be slightly different from the normal ones you can get from stores, I cut out 2 sets of  5" by 5"with a fold at the side. These will be added to the sleeve making them ruffled sleeves. :D


Step 5: Assembling the dress
Since I have 4sets of the skirt, I first sew the 4sets to make it into one skirt. Then, attach the skirt to the bodice by adding small pleats. These pleats make it a smock dress. Now, sew down the skirt.
 Pin the 5"by 5" to the raw edges of the sleeve.

Finally, hem the ends of the sleeves, neckline and skirt.
So how did my smock dress go?


Isn't it pretty?!

 Now who said you can't make your own smock dress?! HAHAHAHAHA!

Next post will be on top with sexy bell sleeves~

Recommended song: You are my everything- Gummy
  

Please visit my youtube channel, mahirah html :)

Hi, I have no idea who is reading this. If you love to sew, DIY and see random unboxing, it will be great if you can subscribe to my chan...

Labels